
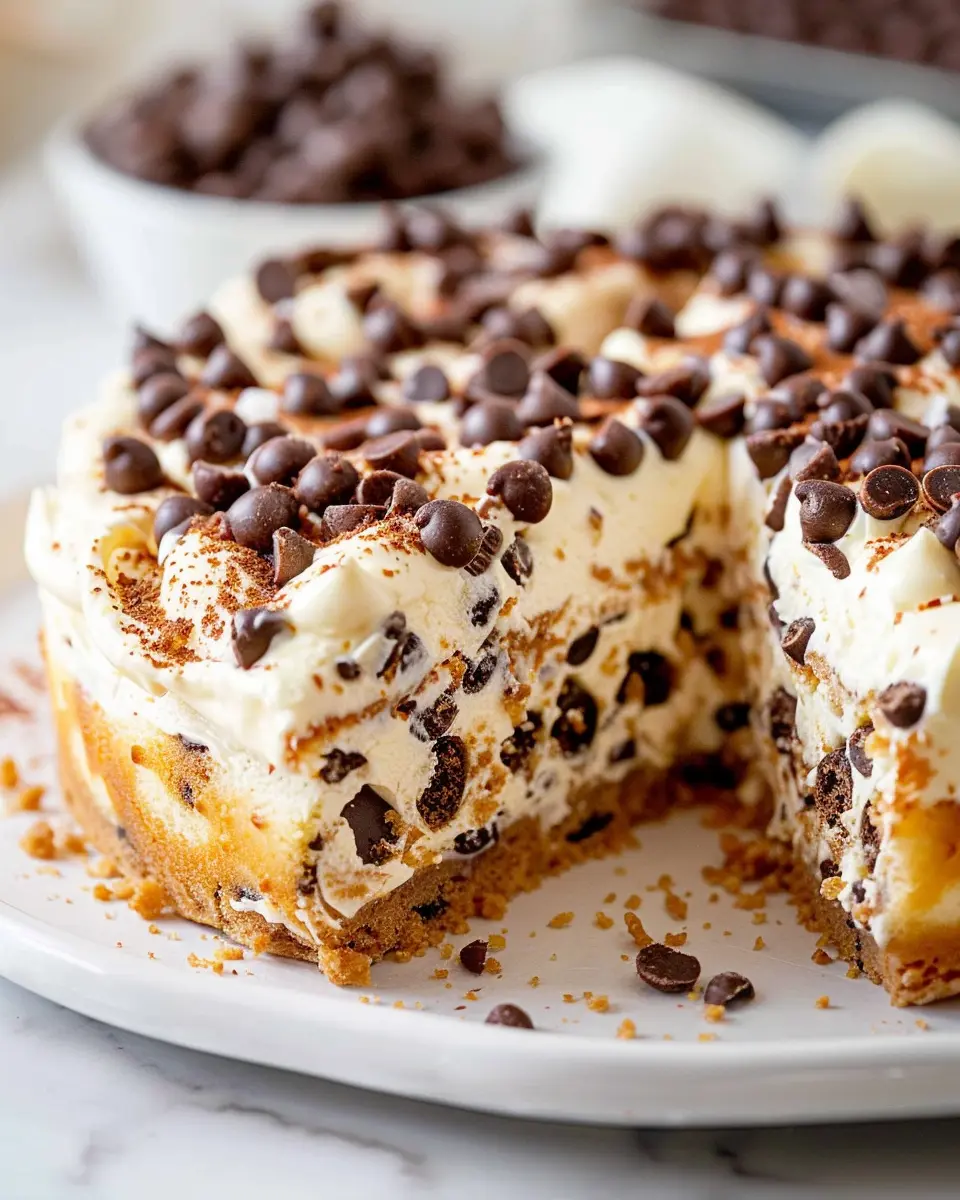
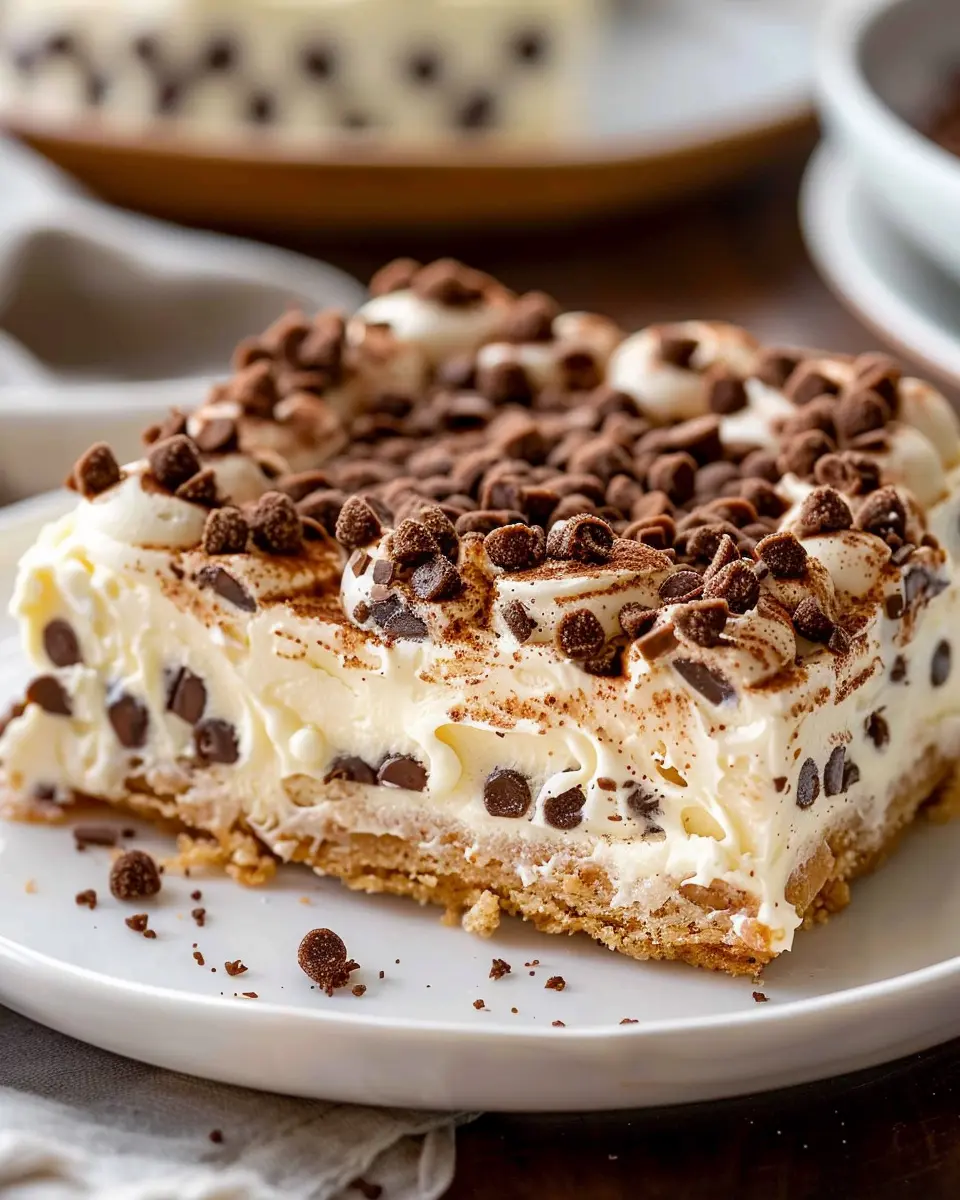
Introduction to Easy Cannoli Cake
When it comes to dessert, we often find ourselves torn between beautiful presentation and incredible taste. Enter the easy cannoli cake, a delightful twist on the classic Italian treat that combines simplicity with that indulgent cannoli flavor we all crave. Why navigate the intricacies of making traditional cannoli when you can whip up this no-bake sensation in a fraction of the time?
Why choose cannoli cake over traditional desserts?
The easy cannoli cake truly shines for several reasons:
-
No-Bake Convenience: You won’t need to turn on your oven, making it perfect for hot summer days or impromptu gatherings. This dessert comes together in a snap, with layers of creamy ricotta and chocolate, all nestled between crisp layers of ladyfingers or graham crackers.
-
Versatility: While traditional cannoli brings its own deliciousness, the cannoli cake allows for customization galore! Want to add some lemon zest or maybe sprinkle some pistachios on top? The possibilities are endless, making it a fantastic option for various tastes and dietary preferences.
-
Showstopper Presentation: This cake looks impressive without requiring advanced baking skills. Just imagine bringing a beautiful, layered dessert to your next potluck or dinner party; everyone will be reaching for seconds.
-
Cultural Delight: Cannoli is not just any dessert; it’s a beloved staple in Italian cuisine. By opting for this cake, you’re embracing that cultural richness and sharing it with your friends and family, potentially introducing them to a new favorite!
Furthermore, a study from the National Dairy Council highlights the nutritional benefits of ricotta cheese—it’s packed with protein and calcium, making it a tasty and satisfying part of your dessert. So, why not treat yourself and your loved ones to something that feels both special and easy to prepare? If you’re already dreaming of that creamy, luscious filling melting in your mouth, let’s dive into this mouthwatering recipe that’s sure to become a staple in your dessert rotation!
For more inspiration, check out Food Network’s guide to Italian desserts and bring a taste of Italy straight to your kitchen!

Ingredients for Easy Cannoli Cake
Creating a mouthwatering easy cannoli cake doesn’t have to be a hassle. With just a handful of simple ingredients, you can whip up this delightful no-bake dessert in no time. Here’s what you need:
List of Essentials for an Easy Cannoli Cake
- 8 oz of mascarpone cheese: This creamy cheese is key for that authentic cannoli flavor.
- 1 cup of ricotta cheese: Adds a rich texture that melts in your mouth.
- 1 cup of powdered sugar: Sweetness is crucial for balancing the flavors.
- 1 tsp of vanilla extract: A splash of vanilla elevates your dessert beautifully.
- 1 cup of mini chocolate chips: These are great for mixing in or sprinkling on top for added indulgence.
- 12 large cannoli shells: You can find these at your local grocery or Italian market.
- Chopped pistachios (optional): For a nutty crunch and garnish.
These ingredients combine to create something light yet indulgent, perfect for any gathering! Don’t forget to check out sites like Food52 for tips on perfecting your baking skills. What’s stopping you from treating yourself?
Step-by-Step Preparation of Easy Cannoli Cake
Creating a delightful easy cannoli cake is a rewarding experience that doesn’t demand much in terms of time or expertise. This no-bake dessert is a perfect pick for any occasion, from casual get-togethers to fancy celebrations. Let’s dive into the step-by-step process that will help you whip up this creamy, dream-like cake in no time!
Prepare the pound cake slices
To kick things off, you’ll need to get your pound cake ready. Store-bought is perfectly fine, or if you’re feeling a bit ambitious, make your own. The key here is to slice the cake into even pieces, about half an inch thick. This ensures they stack neatly and absorb the flavors beautifully.
- Tip: If your pound cake is a bit stale, don’t worry! It will soften as it soaks up the moisture from the filling and ganache.
Once sliced, lay your pieces out on a baking sheet and think about the assembly process. You want to create layers, so be sure to consider how each slice will complement the layers of filling you’re about to prepare.
Make the chocolate ganache
Next up is the luscious chocolate ganache that will tie everything together. This will add a rich, shiny layer to your easy cannoli cake. For the ganache, you’ll need:
- 1 cup of heavy cream
- 8 ounces of high-quality chocolate chips (dark or semi-sweet)
Start by heating the cream in a saucepan over medium heat, stirring occasionally until it just starts to bubble. Remove from heat and immediately mix in the chocolate chips, stirring until smooth and glossy. Let your ganache cool to room temperature while you prep the filling.
Prepare the cannoli filling
Now, let’s create that classic cannoli flavor in the filling. In a mixing bowl, combine:
- 15 ounces of ricotta cheese (drained)
- 1 cup of powdered sugar
- 1 teaspoon of vanilla extract
- 1/2 cup of mini chocolate chips
- Optional: Zest of one lemon for a refreshing twist
Mix these ingredients until they’re velvety and well blended. The ricotta provides that creamy texture we adore in cannoli. Talk about an irresistible flavor!
Whip the heavy cream
For added lightness and texture, we’ll need to whip some heavy cream. Grab another bowl and using a hand mixer, whip:
- 1 cup of heavy cream
Whip until soft peaks form. You want this to be fluffy and airy—almost like a cloud! Gently fold the whipped cream into your cannoli filling. This step is crucial; it’s what gives your easy cannoli cake that dreamy quality.
Assemble the cake layers
Alright, it’s time to bring this cake to life. Starting with a slice of pound cake at the bottom, layer with cannoli filling, followed by another slice of cake. Repeat this process until you have reached your desired height. Don’t forget to reserve some filling for the top; it looks beautiful and enticing.
- Pro Tip: If you want to get extra creative, consider adding chopped nuts or additional chocolate chips between the layers for texture.
Top with ganache and chill
Once you have assembled all your layers, it’s time to top your cake with that heavenly chocolate ganache you made earlier. Pour it over the top, allowing it to drip down the sides—this creates a gorgeous presentation. Finally, cover your easy cannoli cake and let it chill in the refrigerator for at least 4 hours, or overnight if you can wait that long. The longer it sets, the more flavorful it becomes!
There you have it! With each step, you’ve created a stunning, no-bake easy cannoli cake that’s perfect for any gathering. Remember, baking is all about having fun—don’t hesitate to experiment! You might even find your own signature twist on this classic dessert. Happy baking! For more dessert inspiration, check out this guide on no-bake treats.
Variations of Easy Cannoli Cake
When it comes to creating an easy cannoli cake, the possibilities are truly endless! Here are a couple of delightful variations that you can easily whip up to impress your friends and family.
Citrus-Flavored Cannoli Filling
If you’re looking to add a bright twist to your easy cannoli cake, consider incorporating citrus flavors into your filling. A zesty lemon or orange-infused ricotta mixture can elevate the dessert to a whole new level. Simply add some fresh zest and a splash of juice to your traditional cannoli filling recipe. The citrus notes will provide a refreshing contrast to the rich and creamy filling, making each bite a burst of flavor. Plus, this variation is perfect if you’re looking to celebrate spring or summer occasions! For more citrus-inspired desserts, check out the National Citrus Foundation for tips.
Gluten-Free Options
Even those following a gluten-free diet can enjoy an easy cannoli cake. By simply using gluten-free graham crackers or a flourless cake base, you can make this dessert accessible for everyone at your table. The filling remains unchanged, so everyone can savor the classic taste without worry. This flexibility not only caters to dietary restrictions but also ensures that no one feels left out during celebrations. Websites like the Gluten Intolerance Group offer great resources for ingredient swaps and tips.
With these variations, you can customize your easy cannoli cake to fit any taste preference, ensuring an unforgettable experience for your guests! What will you try first?
Cooking Tips and Notes for Easy Cannoli Cake
Best practices for layering
When assembling your easy cannoli cake, start with a firm base—graham crackers or cookies work beautifully. Here’s how to layer like a pro:
- Even Spread: Use an offset spatula to evenly spread your filling across each layer. This prevents lumps and ensures every bite is creamy.
- Alternate Textures: Consider adding a layer of mini chocolate chips or crushed pistachios between filling layers for a delightful crunch.
- Chill Between Layers: After your first couple of layers, pop the cake into the refrigerator for 15-30 minutes. This helps set the layers and makes it easier to slice.
Creaminess tips for the filling
A smooth, creamy filling is the heart of your easy cannoli cake. Follow these tips for the perfect texture:
- Use Full-Fat Ingredients: Opt for full-fat ricotta or mascarpone. They provide richness that light versions can’t match.
- Sift for Smoothness: Before mixing, sift your powdered sugar to avoid any lumps that can disrupt the decadent experience.
- Blend It Well: Using a stand or hand mixer, blend your filling until it’s fluffy and seamless. This aeration enhances creaminess, making every slice irresistible.
These tips will elevate your dessert game, ensuring your easy cannoli cake impresses at any gathering! For more details on dessert layering techniques, check out resources like Serious Eats.
Serving Suggestions for Easy Cannoli Cake
When you’re ready to indulge in your easy cannoli cake, consider how to elevate this delightful dessert to a full dining experience. Here are a couple of delightful serving suggestions.
Pairing with Fresh Fruits
Fresh fruits can add a beautiful contrast to the creamy richness of your easy cannoli cake. Try serving slices with:
- Ripe strawberries
- Juicy blueberries
- Sliced kiwis
These colorful fruits not only enhance the plate’s aesthetics but also introduce a refreshing tang that balances the sweetness of the cake. For more information on fruit pairings, check out this helpful resource on perfect fruit complements.
Complementary Coffee Options
A robust coffee can really round out the flavors of your dessert. Consider brewing a:
- Dark roast espresso
- Creamy cappuccino
- Lightly flavored vanilla latte
The aromatic tones of coffee will harmonize with the mascarpone and ricotta in the easy cannoli cake, making each bite and sip a delightful treat. A study on coffee pairings can be found here.
Incorporate these simple yet effective suggestions to make your easy cannoli cake the star of any gathering!
Time Breakdown for Easy Cannoli Cake
Preparation Time
Getting started on your easy cannoli cake is a breeze! You’ll need about 30 minutes to gather your ingredients and blend them into a luscious, creamy filling. From measuring out the ricotta to mastering the perfect blend with powdered sugar and chocolate chips, this step is all about creativity and personal touch.
Chilling Time
The real magic happens during the chilling phase, where your cake sets beautifully. Allow at least 2 to 4 hours in the refrigerator. This not only enhances the flavors but also lets the cake firm up, making it easier to slice and serve.
Total Time
In total, you’re looking at around 2.5 to 4.5 hours from start to finish. This makes it a fantastic choice for spontaneous gatherings or dessert cravings. If you really want to impress your friends, consider preparing it the night before! For more tips and tricks on no-bake desserts, check out The Spruce Eats.
Ready to indulge in this delicious twist on a classic? Let’s dive into the easy cannoli cake recipe!
Nutritional Facts for Easy Cannoli Cake
When you’re diving into the delightful world of easy cannoli cake, it’s essential to know what you’re indulging in. Here’s a quick breakdown of the nutritional facts that help you enjoy this delectable dessert guilt-free.
Calories
A slice of this cake typically contains around 250 calories, making it a sweet treat that won’t completely derail your day.
Protein
With its creamy filling and layers, this dessert offers a satisfying 6 grams of protein per slice, providing a bit of sustenance alongside the sugar rush.
Sugars
While it’s undeniable that desserts carry sugar, this easy cannoli cake has approximately 16 grams of sugar per slice. It’s perfect for satisfying your sweet tooth without going overboard.
For more on finding a balance in your dessert choices, check out the American Heart Association for guidance on sugar intake. And remember, moderation is key!
FAQs about Easy Cannoli Cake
When it comes to preparing and enjoying your easy cannoli cake, you might have a few questions. Let’s dive into some frequently asked questions that could help enhance your dessert experience!
How long can I store the cannoli cake?
You can store your easy cannoli cake in the refrigerator for up to 3 to 4 days. Just make sure to cover it tightly with plastic wrap or place it in an airtight container to keep it fresh. The flavors continue to meld over time, so the cake may actually taste even better the next day! If you think you might not finish it in time, consider freezing it (more on that below).
Can I freeze leftover cannoli cake?
Absolutely! Freezing your easy cannoli cake is a great option if you want to enjoy it later. Wrap individual slices tightly in plastic wrap and then place them in a freezer-safe container or bag. This way, you can thaw only what you need. The cake can be stored in the freezer for up to 2-3 months. To thaw, simply move it to the fridge for a few hours or overnight.
What is the best way to serve the cake?
Serving your easy cannoli cake can be delightful! For an impressive presentation, garnish with some chocolate chips, chopped nuts, or a dusting of powdered sugar right before serving. Pair it with a hot beverage like coffee or a raspberry tea to complement the creaminess of the cake. Want to elevate it even more? Add a dollop of whipped cream on each slice.
These simple tips will ensure your cannoli cake is the star of any gathering! For more dessert ideas, check out The Spruce Eats for inspiration.
Conclusion on Easy Cannoli Cake
In summary, the easy cannoli cake is a delightful dessert that beautifully combines indulgence with simplicity. Its stunning layers of creamy ricotta and sweet chocolate chips promise to wow your guests without the hassle of baking. With just a few basic ingredients and minimal preparation, you can whip up this no-bake treat in no time, making it perfect for both spontaneous celebrations and planned gatherings.
So why not add a little sweetness to your next event? Serve this cake chilled to enhance its refreshing flavors, and watch as everyone falls in love with this Italian classic. For more inspiration, check out resources like Serious Eats for Italian dessert tips!
PrintEasy Cannoli Cake: Indulgent No-Bake Dessert for All Occasions
Enjoy this Easy Cannoli Cake, a delectable no-bake dessert perfect for every occasion. It’s indulgent, creamy, and bursting with traditional cannoli flavors.
- Prep Time: 20 minutes
- Total Time: 4 hours 20 minutes
- Yield: 8 servings
- Category: Dessert
- Method: No-Bake
- Cuisine: Italian
- Diet: Vegetarian
Ingredients
- 2 cups ricotta cheese
- 1 cup powdered sugar
- 1 teaspoon vanilla extract
- 1 cup heavy whipping cream
- 1 package graham crackers
- 1/2 cup mini chocolate chips
- 1/4 cup chopped pistachios
- 1/2 teaspoon ground cinnamon
Instructions
- In a large bowl, combine ricotta cheese, powdered sugar, and vanilla extract.
- In another bowl, whip the heavy cream until stiff peaks form.
- Fold the whipped cream into the ricotta mixture until well combined.
- Layer graham crackers at the bottom of a baking dish.
- Spread half of the ricotta mixture over the graham crackers.
- Sprinkle with mini chocolate chips and chopped pistachios.
- Add another layer of graham crackers followed by the remaining ricotta mixture.
- Dust with ground cinnamon on top.
- Chill in the refrigerator for at least 4 hours or overnight before serving.
Notes
- For an extra crunch, you can add crushed nuts between layers.
- Make sure to use full-fat ricotta for the best texture.
- This dessert can be made ahead of time and stored in the fridge.
Nutrition
- Serving Size: 1 slice
- Calories: 300
- Sugar: 20g
- Sodium: 150mg
- Fat: 18g
- Saturated Fat: 10g
- Unsaturated Fat: 5g
- Trans Fat: 0g
- Carbohydrates: 30g
- Fiber: 1g
- Protein: 6g
- Cholesterol: 60mg