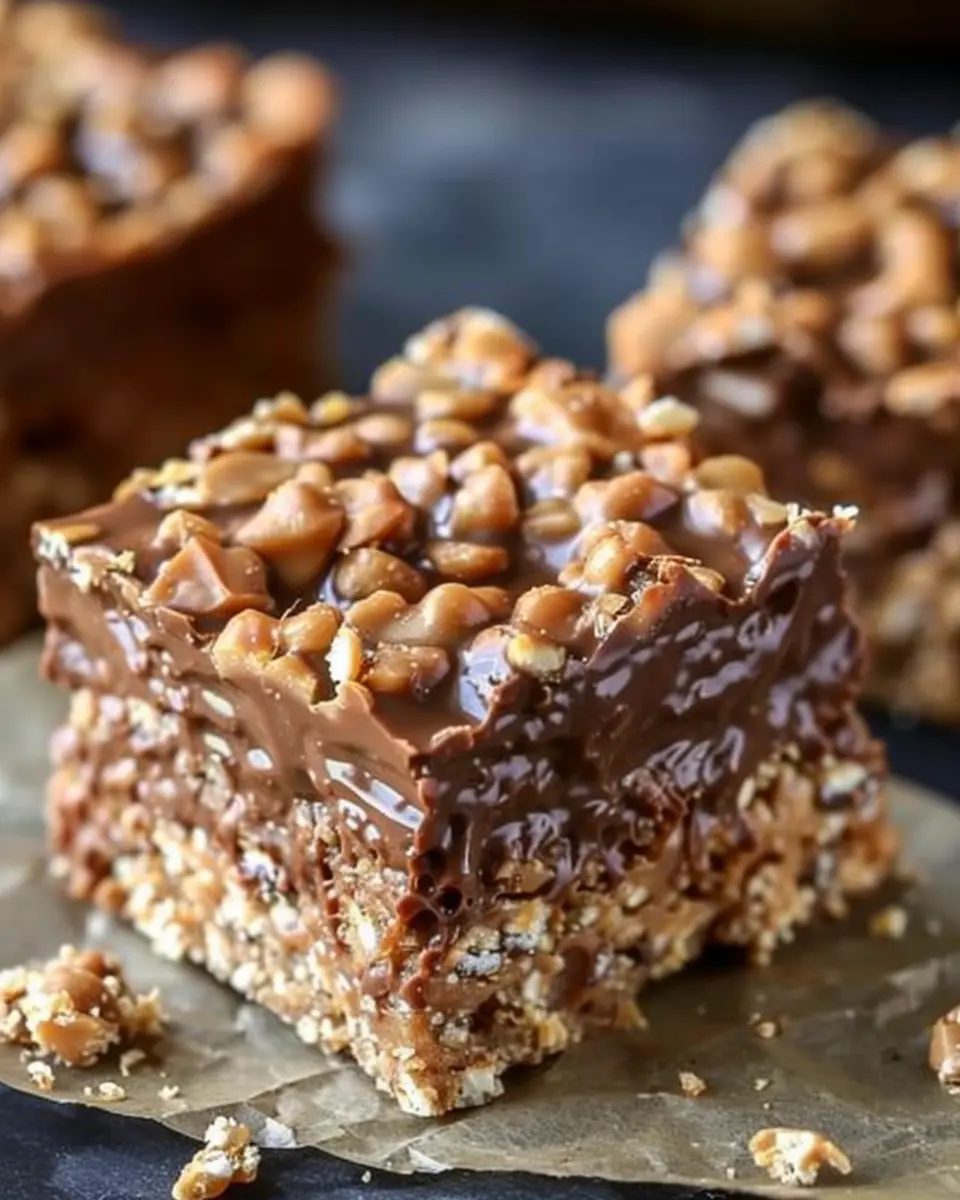
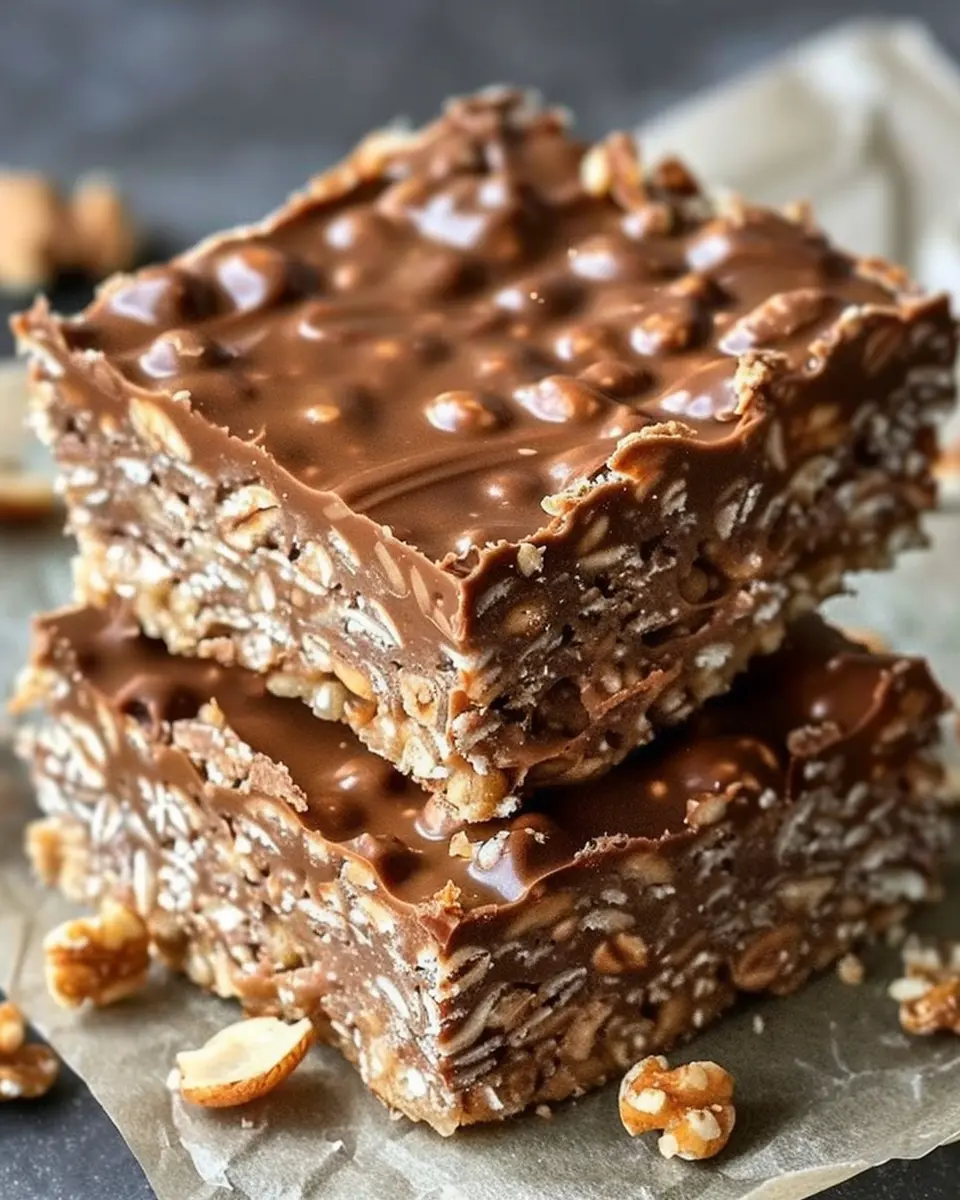
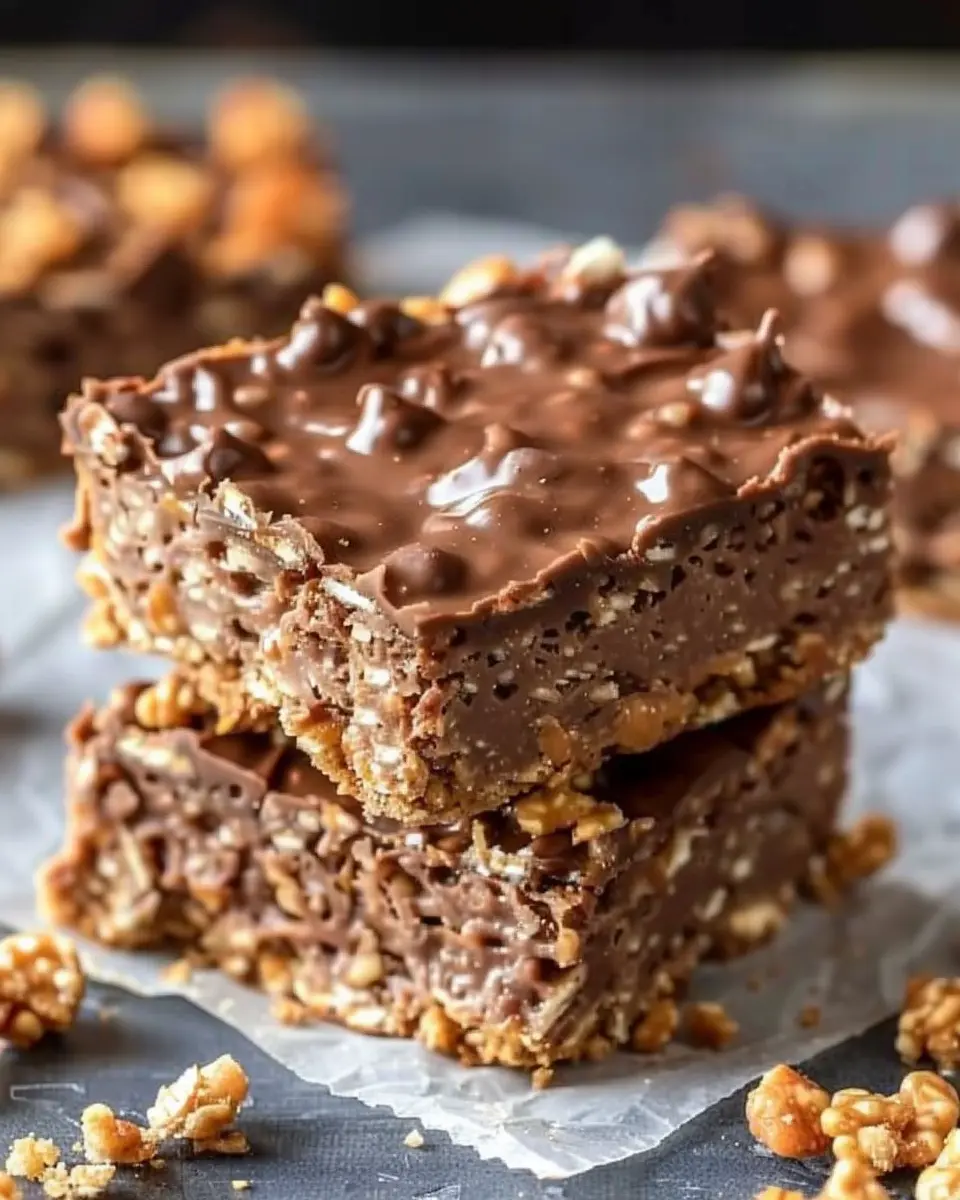
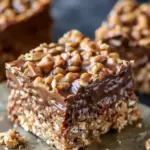
Introduction to Homemade Crunch Bars
There’s something undeniably satisfying about biting into a crunchy bar that’s both sweet and savory. However, have you ever thought about making your own? When you whip up your own batch of homemade crunch bars, you’re not just creating a tasty treat; you’re also making a game-changing snack. Let’s dive into why this delightful recipe is worth trying out.
Why Homemade Crunch Bars Are a Game Changer
First off, homemade crunch bars allow you to control the ingredients. This means you can swap out any additives or preservatives commonly found in store-bought versions for wholesome ingredients that fit your diet. Want to go gluten-free? Or perhaps lower the sugar content? With homemade, the choice is entirely yours. According to a report from the Food and Drug Administration, a surprising number of commercial snacks contain hidden sugars and unhealthy fats, so why not make your own where you know exactly what goes in?
Another compelling reason is freshness. Think about it: nothing beats the taste of a snack made just hours—or even minutes—ago. The crunch is real, and you can enjoy the delightful contrasts of textures and flavors that come from using high-quality ingredients. Try incorporating dark chocolate, peanut butter, or even dried fruit to customize your bars. Not to mention that making something from scratch can be incredibly fulfilling—it’s like crafting your own masterpiece!
You may be wondering, “But aren’t homemade snacks time-consuming?” The answer might surprise you: this homemade crunch bar recipe is straightforward and can be made in less than 30 minutes! Perfect for young professionals juggling busy lives, these bars are not just snacks—they can double as a quick breakfast or a post-work whimsy.
Feeling inspired? Need a bit of guidance? The beauty of these homemade crunch bars is in their flexibility. Check out The Kitchn for more creative variations, or explore Healthline for tips on nutritious ingredients that can elevate your bars. It’s time to unleash your inner chef and create a crowd-pleasing, award-winning treat right in your kitchen!
Ingredients for Homemade Crunch Bars
Essential ingredients for crunchy perfection
Creating homemade crunch bars at home is not only rewarding but also an opportunity to indulge in some seriously delicious flavors. To achieve that perfect crunch and decadent taste, here are the essentials you’ll need:
- Rice cereal: The base of our bars, providing that signature crunch.
- Chocolate: Choose your favorite—milk, dark, or even white chocolate for a twist.
- Nut butter: Creamy peanut butter or almond butter works wonders, adding richness and binding the ingredients.
- Honey or maple syrup: Natural sweeteners that help to hold your bars together while adding a touch of sweetness.
These four ingredients alone will set the stage for a delightful treat.
Optional ingredients for personalization
Feeling adventurous? Personalize your homemade crunch bars with these optional ingredients:
- Nuts and seeds: Chopped almonds, walnuts, or sunflower seeds can amp up the crunch factor.
- Dried fruits: Think cranberries, raisins, or apricots for a fruity twist.
- Spices: A dash of cinnamon or sea salt can elevate the flavor profile.
Feel free to mix and match these options to create a bar that’s uniquely yours! For tips on ingredient substitutions and the science behind texture, check out resources from Serious Eats or The Kitchn. Happy crunching!
Step-by-step Preparation of Homemade Crunch Bars
Creating your own homemade crunch bars is not only a delightful way to indulge your sweet tooth but also a fantastic opportunity to impress friends and family with your culinary skills. This award-winning recipe combines rich chocolate with crispy rice cereal for a treat that’s both satisfying and easy to make. Let’s walk through the process together!
Gather Your Equipment
Before diving into the delicious world of homemade crunch bars, it’s essential to gather all your equipment. Here’s what you’ll need:
- A large mixing bowl
- A microwave-safe bowl or saucepan
- A spatula or wooden spoon
- A baking dish (typically 8×8 inches)
- Parchment paper (for easy removal)
- A sharp knife (for cutting the bars)
Having everything at hand will make the process smoother and help you stay organized.
Prepare the Mixing Bowl
Start by ensuring your mixing bowl is clean and dry. This may seem trivial, but it’s a crucial step to preventing any unwanted flavors from mixing into your bars. If you’re using a glass bowl, place it in the microwave for 30 seconds to warm it slightly. This tip helps to melt your chocolate smoothly, which is key to the taste and texture of your homemade crunch bars.
Combine the Chocolate Mixture
Now, it’s time to create the chocolate base! Pour your chocolate chips, preferably semi-sweet for that perfect balance between sweet and savory, into your microwave-safe bowl. Microwave in short bursts of 30 seconds, stirring in between until you reach a smooth consistency. If you prefer stovetop methods, you can melt the chips in a saucepan over low heat, stirring constantly.
Feel free to add a pinch of salt to the mixture for enhanced flavor—it can truly elevate your bars! For added depth, consider mixing in a teaspoon of vanilla extract as well. Now, isn’t that tempting?
Mix in the Crispy Rice Cereal
Once your chocolate mixture is ready, it’s time to add the crispy rice cereal. Gently fold the cereal into the melted chocolate using your spatula. Aim for an even coat so that every bite is equally delicious. If you’re feeling adventurous, you could even add other mix-ins such as mini marshmallows or crushed nuts for added texture.
Remember, the goal is to achieve a nice, uniform mixture without crushing the cereal too much—this gives your homemade crunch bars that delightful crunch!
Transfer to Baking Dish
Now that your mixture is perfectly combined, line your baking dish with parchment paper. This step is essential for easy removal later. Pour the chocolate and cereal mixture into the dish and use your spatula to spread it evenly, pressing down lightly to compact it all together. No need for perfection here; a rustic look can be charming and appetizing in its own right!
Chill and Cut Into Bars
Finally, it’s time to let your homemade crunch bars set. Place the baking dish in the refrigerator for about 1 hour, or until the chocolate is firm. Once chilled, use your sharp knife to cut the mixture into bars. You can opt for traditional rectangular shapes or get creative with fun, bite-sized pieces.
As a little tip, if you warm your knife slightly under hot water, it will make cutting through the chocolate much easier. Share these delicious bars with friends, or keep them all to yourself—no judgment here!
With these steps, you’ll not only have a batch of homemade crunch bars to enjoy but also a newfound confidence in the kitchen. Remember, cooking is all about practice, experimentation, and most importantly, having fun! For more sweet treats and kitchen tips, make sure to check out resources like Bon Appétit or Food Network. Happy cooking!
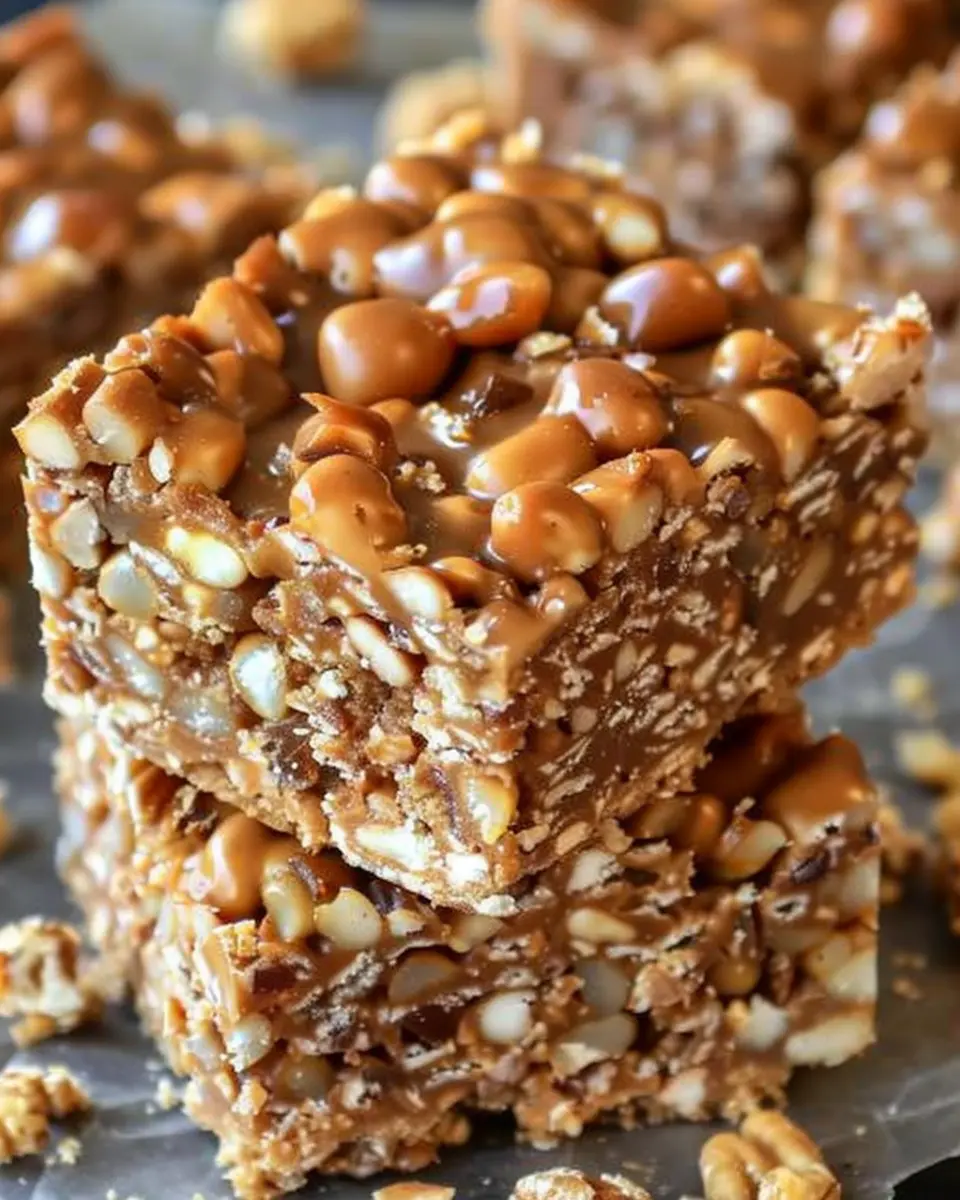
Variations on Homemade Crunch Bars
Chocolate Almond Crunch Bars
For a delightful twist on traditional homemade crunch bars, consider adding a layer of rich chocolate and roasted almonds. Begin with your classic base, then melt semi-sweet chocolate and mix in a handful of chopped almonds. Pour this decadent blend over your crunchy mixture before setting it in the fridge. The combination of creamy chocolate and nutty almonds creates a satisfying crunch in every bite! You can even substitute dark chocolate for a richer flavor. If you’re looking for inspiration, Whole Foods offers various chocolate options that can elevate your bars to gourmet status.
Peanut Butter Coconut Crunch Bars
If you’re a fan of the classic peanut butter and chocolate combination, these homemade crunch bars are sure to please. Simply mix creamy peanut butter into your base and add unsweetened shredded coconut for extra texture. Not only does this heighten the flavor, but it also gives your bars a tropical flair. A sprinkle of sea salt on top can balance the sweetness beautifully. This variation not only satiates your sweet tooth but also provides a protein-packed snack that’s perfect for busy professionals on the go.
Sugar-Free Crunch Bars
For those looking to reduce sugar intake without sacrificing taste, sugar-free crunch bars are a delightful option. You can use sugar substitutes like erythritol or stevia in your recipe to achieve that sweet flavor without the calories. Combine with a few nuts or seeds for added crunch and nutrition. Did you know that sugar substitutes can significantly lower the calorie content of your snacks? A study published in the American Journal of Clinical Nutrition highlights the benefits of mindful sugar consumption. With these variations, you can enjoy your homemade crunch bars guilt-free!
Experiment with these recipes and discover the unique flavors you can create right in your kitchen. Happy crunching!
Cooking Tips and Notes for Homemade Crunch Bars
Tips for Perfect Consistency
Creating the ideal homemade crunch bars hinges on achieving the perfect texture. Here are a few tips to guide your process:
- Temperature Matters: Make sure your chocolate is melted slowly over low heat to prevent burning. Using a double boiler can help maintain even temperatures.
- Mix-in Moderation: When adding ingredients like nuts or crispy rice, mix until just combined. Overmixing can lead to a less crunchy texture.
- Chill Thoroughly: After spreading your mixture, ensure it’s properly chilled until fully set. This helps the bars hold their shape when cut.
Suggestions for Storage and Freshness
To keep your homemade crunch bars as fresh as possible, follow these guidelines:
- Airtight Containers: Store your bars in an airtight container at room temperature. This keeps them crisp without risking sogginess.
- Freeze for Longevity: If you plan to keep them longer, wrap individual bars in plastic wrap and place them in a freezer-safe bag. They can last for up to three months!
- Thawing Tips: When ready to enjoy them again, simply take them out and let them thaw at room temperature for about 30 minutes.
For more about food storage best practices, check out resources from the USDA. Remember, enjoying the crunchiness of your bars is all about how you store them!
Serving Suggestions for Homemade Crunch Bars
Enjoy as a snack or dessert
There’s something undeniably satisfying about homemade crunch bars. Whether you’re in need of a quick snack during a workday or a sweet finish to your dinner, these bars are both versatile and delightful! Enjoy them on their own for a quick energy boost, or crumble them over a scoop of vanilla ice cream for a rich dessert experience. Pair them with your morning coffee or afternoon tea for an extra treat that can effortlessly elevate your mood.
Pairing options for enhanced flavor
To maximize the flavor experience of your homemade crunch bars, consider complementary pairings. Here are a few ideas:
- Fresh fruits: A side of berries or sliced apples adds freshness and a hint of acidity.
- Dairy choices: Serve with Greek yogurt or a drizzle of chocolate sauce for extra indulgence.
- Crunchy extras: Top your bars with a sprinkle of sea salt or crushed nuts for added texture and flavor.
These combinations not only enhance the overall tasting experience but also make your homemade crunch bars a more satisfying meal. For more ideas on gourmet pairings, check out Serious Eats. Have fun experimenting!
Time Breakdown for Homemade Crunch Bars
Creating your own homemade crunch bars is a delightful experience that’s not only satisfying but also quite manageable. Let’s talk timing so you can plan accordingly!
Preparation Time
Getting your ingredients together and mixing the sticky goodness will take about 15-20 minutes. This is the perfect time to put on your favorite playlist and get in the zone.
Cooling Time
Once you’ve made your batch, allowing the bars to cool and set is essential. This typically takes around 1-2 hours. A little patience here will reward you with perfectly structured bars.
Total Time
In total, you’re looking at about 1 hour and 20 minutes to 2 hours and 20 minutes from start to finish. Not too shabby for an award-winning recipe!
Want to enhance your bars? Check out more on the science behind chocolate melting here. Or, learn more about the best toppings for your homemade crunch bars at popular culinary sites.
Give yourself this time, and you’ll have a delicious treat worth any wait!
Nutritional Facts for Homemade Crunch Bars
When indulging in your homemade crunch bars, it’s good to know what you’re putting into your body. Here’s a quick breakdown of the key nutritional facts to keep your energy up throughout the day.
Calories
Each serving of these delectable bars typically contains around 200 calories. This makes them a satisfying treat without derailing your healthy eating goals.
Carbohydrates
With approximately 30 grams of carbohydrates per bar, they provide that essential fuel you need, especially after a workout or during a busy day at work.
Protein Content
You can expect about 5 grams of protein in every bite. While they’re not protein powerhouses, they do offer a nice balance alongside those crunchy carbs.
For more detailed nutritional information, check out this resource from the USDA or visit NutritionData for a broader analysis. It’s important to stay informed about your dietary choices!
FAQ about Homemade Crunch Bars
Can I make these bars without peanut butter?
Absolutely! If you’re aiming for a nut-free version of homemade crunch bars, you can substitute peanut butter with sunflower seed butter or a creamy coconut butter. These alternatives will still provide a delicious texture and flavor. Just keep in mind that the taste might slightly differ, but your crunch bars will still be a crowd-pleaser.
How long do homemade crunch bars last?
When stored properly, homemade crunch bars can last up to two weeks. Make sure to keep them in an airtight container at room temperature for optimal freshness. If you want to extend their shelf life, consider freezing them. Just wrap each bar in parchment paper and place them in a zip-top bag for easy access later. When you’re ready to indulge, simply thaw them at room temperature for a few hours.
Are homemade crunch bars healthy?
That really depends on your definition of health! While these bars are definitely a treat, they can be made healthier by using whole ingredients. A quick glance at the recipe shows that you can include oats and rice cereal, offering some fiber. Additionally, opting for dark chocolate as a topping can provide antioxidants. Just keep an eye on portion sizes, as these bars are energy-dense and packed with flavor.
Want to learn more about the health aspects of homemade snacks? Check out this great resource from the American Heart Association for tips and guidelines on balanced diets.
Creating your own homemade crunch bars can be a fun process filled with creativity, so don’t be afraid to experiment with different flavors and ingredients!
Conclusion on Homemade Crunch Bars
Embracing homemade convenience
In a busy world, finding time to create homemade crunch bars serves not only as a delicious treat but also as a delightful form of self-care. These bars are packed with flavor, offering a satisfying blend of crunchiness and sweetness, all while you know exactly what ingredients are going in. Whether you’re prepping snacks for your week or looking to impress at your next gathering, these bars deliver on every count. With just a few simple ingredients, you can whip up a batch that’s better than store-bought! Ready to make your own and elevate your snack game? Check out this resource for more delicious ideas!
PrintHomemade Crunch Bars: The Easy Award Winning Recipe You’ll Love
Experience the deliciousness of these homemade crunch bars that are sure to become your new favorite treat!
- Prep Time: 10 minutes
- Cook Time: 5 minutes
- Total Time: 15 minutes
- Yield: 12 bars
- Category: Dessert
- Method: No-bake
- Cuisine: American
- Diet: Vegetarian
Ingredients
- 2 cups rice cereal
- 1 cup milk chocolate chips
- 1 cup peanut butter
- 1/2 cup honey
- 1 teaspoon vanilla extract
Instructions
- In a saucepan, combine the peanut butter and honey over medium heat until melted.
- Remove from heat and stir in vanilla and chocolate chips until combined.
- Add the rice cereal and gently mix until fully coated.
- Press mixture into a greased baking dish and refrigerate until set.
- Cut into bars and enjoy!
Notes
- For a twist, add nuts or dried fruits to the mixture before pressing into the dish.
Nutrition
- Serving Size: 1 bar
- Calories: 150
- Sugar: 10g
- Sodium: 50mg
- Fat: 7g
- Saturated Fat: 3g
- Unsaturated Fat: 3g
- Trans Fat: 0g
- Carbohydrates: 18g
- Fiber: 1g
- Protein: 4g
- Cholesterol: 0mg